Why Most Home Server Setups Disappoint (And What Actually Works for Real Control)
I remember the excitement when I first decided to build a home server. Dreams of a personal cloud, automated backups, media streaming without limits, and a place to host my own small projects danced in my head. I pictured a sleek, silent box humming away in a corner, seamlessly integrating into my digital life. The reality for many, however, including my own early attempts, is often a convoluted mess of incompatible software, slow performance, constant troubleshooting, and a machine that gathers dust more than it serves its purpose. The initial allure of saving money or gaining ‘total control’ quickly fades when you’re wrestling with network configurations at 2 AM or rebuilding an entire system because of a minor update.
Most people approach a home server with a vague idea of what they want but without a clear understanding of the underlying technical challenges and the sheer time commitment. They buy a cheap, underpowered mini-PC or repurpose an ancient desktop, load it with a general-purpose OS, and then try to bolt on every service imaginable. This piecemeal approach almost always leads to instability, security vulnerabilities, and frustration. My own journey involved countless hours trying to get Plex to play nicely with a Docker container while simultaneously attempting to configure a Nextcloud instance on a different port, all on hardware that was clearly not up to the task. It was a cycle of hope, failure, and a deep dive into obscure forum posts.
But it doesn’t have to be this way. With the right planning, hardware choices, and a focused approach, a home server can be an incredibly powerful and rewarding tool. It’s about understanding the specific problems you’re trying to solve and choosing the right tools for the job, rather than trying to do everything at once. What changed everything for me was shifting my mindset from “What can this server do?” to “What do I really need this server to do well?” and then building outward from there.
Key Takeaways
- Repurposing old consumer hardware often leads to more problems than solutions due to power inefficiency, noise, and lack of specialized features.
- Trying to run too many disparate services on a single, general-purpose operating system creates instability and security vulnerabilities.
- Virtualization or containerization is essential for isolating services, simplifying management, and ensuring long-term reliability.
- Proper network configuration, including static IPs and firewall rules, is crucial for both security and consistent access to your server.
- Start with one or two core applications you genuinely need, master their setup, and then gradually expand your server’s capabilities.
The Fatal Flaw of Repurposed Hardware (And Why Dedicated Hardware Wins)
The most common mistake I see people make, and one I made myself, is attempting to breathe new life into an ancient desktop or a low-power single-board computer (SBC) like a Raspberry Pi for tasks it simply isn’t designed for. While the allure of ‘free’ hardware is strong, the hidden costs quickly add up. An old desktop PC, even an idle one, can consume significantly more power than modern, purpose-built server hardware, leading to higher electricity bills over time. More importantly, older hardware often lacks the specific features that make server management a breeze.
Take, for instance, ECC (Error-Correcting Code) RAM. While largely absent from consumer-grade desktops, it’s a staple in true server hardware. For a home server storing critical data, ECC RAM can prevent silent data corruption caused by memory errors, a non-trivial concern when you’re dealing with terabytes of photos, videos, or backups. Furthermore, consumer motherboards often have fewer SATA ports, limited expandability for network cards, and rudimentary BIOS/UEFI options compared to server or prosumer-grade boards. This restricts your ability to add more storage drives or dedicated network interfaces for different services.
My experience with repurposing an old gaming rig as a server was a constant battle against noise, heat, and inefficient power draw. The fans would spin up erratically, and the machine was oversized for its purpose, yet still underpowered for concurrent tasks like transcoding media while performing backups. What changed everything for me was investing in dedicated server-grade or prosumer-grade hardware. This doesn’t mean breaking the bank on enterprise-level equipment, but rather selecting components designed for 24/7 operation and specific server tasks. Think about mini-ITX boards with multiple Gigabit Ethernet ports, CPUs with low TDP (Thermal Design Power) but sufficient cores for light virtualization, and cases designed for multiple hard drives with good airflow. For example, a low-power Intel Celeron or Pentium N-series CPU is often more than enough for a home media server or file share, consuming a fraction of the power of an older i5 or i7, and offering integrated graphics that are useful for initial setup but then stay out of the way. This shift significantly reduced my power bill, eliminated annoying fan noise, and provided a stable foundation that just worked.
The Over-Engineering Trap: Why General-Purpose OS Builds Fail
Another pitfall is trying to make a general-purpose operating system like Windows or Ubuntu Desktop do too many things at once. I remember installing Ubuntu Server, then manually installing Plex, Nextcloud, a torrent client, and a web server, all directly on the host OS. This approach creates a tangled web of dependencies, conflicting libraries, and security headaches. A minor update to one service can inadvertently break another, leading to hours of debugging just to get things back online. The host OS becomes bloated and difficult to maintain.
The real power of a home server comes from isolation and modularity. This is where virtualization and containerization truly shine. Instead of installing everything directly on your main OS, you create isolated environments for each application or service. My transformative moment came when I embraced Docker for containerized applications and Proxmox VE for virtual machines. Proxmox, for example, allows you to run multiple virtual machines (VMs) and containers (LXC) on a single physical server. You can have a dedicated VM for your file server, another for Plex, and separate containers for smaller services like Pi-hole or Home Assistant. Each environment is self-contained, meaning an issue in one won’t bring down the others.
This approach simplifies troubleshooting immensely. If my Plex server goes down, I know it’s contained within its specific VM or Docker container, and the rest of my server services remain untouched. It also makes security much easier. You can create network rules specific to each VM or container, limiting their access to only what they need. Furthermore, it allows for easy experimentation. Want to try out a new application? Spin up a new VM or container, test it, and if it doesn’t work out, simply delete it without affecting your core server setup. This shift from a monolithic, tightly coupled system to a modular, isolated architecture saved me countless hours of frustration and made my home server far more reliable and enjoyable to manage.
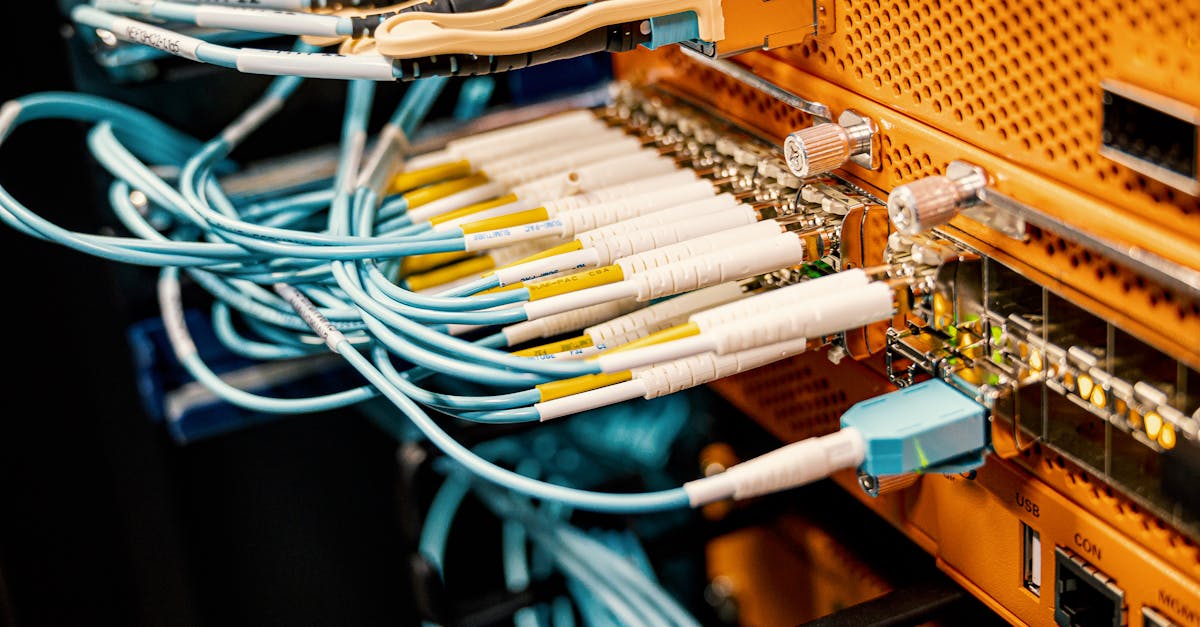
The Network Blind Spot: Why Your Server Isn’t Reaching Its Potential
Many aspiring home server administrators focus so much on the server hardware and software that they completely overlook the network infrastructure. A powerful server is only as good as its connection to the rest of your devices and, crucially, the outside world. The mistake I see most often is neglecting basic network hygiene, leading to inconsistent access, slow transfer speeds, and potential security vulnerabilities.
For instance, relying on DHCP to assign an IP address to your server is a recipe for headaches. If your router reboots or leases expire, your server’s IP address might change, breaking all your port forwards, static routes, and internal references. What changed everything for me was configuring a static IP address for my server within my router’s settings (or directly on the server if you know what you’re doing). This ensures your server is always accessible at the same internal address, which is critical for consistent internal access and for configuring port forwarding if you need external access.
Beyond static IPs, understanding your network topology is vital. Are you using Gigabit Ethernet? Is your server connected directly to your router or through an old, slow switch? Are your cables Cat5e or Cat6? These seemingly minor details significantly impact performance. I found that upgrading my primary network switch to a managed Gigabit switch allowed me to segment my network, creating separate VLANs for IoT devices, guest access, and my server, significantly enhancing both security and performance. For example, my media server now resides on a dedicated VLAN, ensuring that its high-bandwidth traffic doesn’t interfere with other network activities.
Finally, the router itself is often the bottleneck. Many ISP-provided routers are notoriously underpowered for advanced networking tasks. Upgrading to a more robust router with better processing power and advanced firewall capabilities is a worthwhile investment. This allows for more granular control over inbound and outbound traffic, critical for securing your server against external threats while allowing legitimate access to specific services.
The Security Oversight: Exposing Your Data Unintentionally
Building a home server often involves wanting to access your data from anywhere. This desire for external access, however, is where most people unknowingly create significant security risks. The mistake I see most often is blindly forwarding ports on their router without understanding the implications or implementing proper safeguards. Opening a port on your router is like leaving a door to your house wide open – anyone can walk in if they know where to look.
My early attempts involved forwarding ports for everything: Plex, Nextcloud, a custom web server. I was relying solely on the application’s built-in security, which is often insufficient for direct internet exposure. The hidden cost of this convenience is the constant threat of automated scans and attacks looking for vulnerabilities. What changed everything for me was adopting a layered security approach and, crucially, understanding when not to expose a service directly.
For external access, I now prioritize using a VPN (Virtual Private Network). Instead of opening individual ports for each service, I run an OpenVPN or WireGuard server on my home network (often within a dedicated VM or container). When I need to access my server’s resources from outside my home, I simply connect to my home VPN. This creates a secure, encrypted tunnel, making it appear as if my device is on my home network. All my server services remain behind my firewall, unexposed to the public internet, and only accessible once I’ve authenticated through the VPN. This is exponentially more secure than port forwarding individual applications.
For services that absolutely must be accessible publicly (e.g., a personal website), I use a reverse proxy like Nginx Proxy Manager. This acts as a single, secure entry point for all web-based services. It handles SSL/TLS termination, centralizing certificate management (hello, Let’s Encrypt!), and routes traffic to the correct internal service without exposing those services directly. It also adds an additional layer of security, as only the reverse proxy is directly exposed to the internet. Combining this with strong, unique passwords, two-factor authentication where available, and regular security updates across all server components has transformed my server from a potential security liability into a robust, protected asset.
The Feature Creep Conundrum: Too Many Services, Too Little Focus
When you first set up a home server, the possibilities seem endless. You can host a media server, a file sync solution, a password manager, a smart home hub, a game server, a personal wiki – the list goes on. The mistake I see most often is falling into the trap of feature creep, trying to implement every cool project you read about without a clear need. This leads to an overloaded, complex system that is difficult to maintain and prone to failure.
My early server builds were Frankenstein monsters of half-configured services. I’d install Plex, then Nextcloud, then try to set up an elaborate backup scheme, all while dabbling in Home Assistant. Each new service added complexity, consumed resources, and introduced potential points of failure. The result was a server that did many things poorly rather than a few things exceptionally well. What changed everything for me was adopting a minimalist and iterative approach.
Start with one or two core functions that you genuinely need and will use regularly. For me, it was a robust file server for centralized storage and a media server. I focused all my efforts on getting these two services running perfectly: optimizing storage arrays (e.g., using ZFS for data integrity), configuring automated backups, and ensuring reliable media streaming. Only once these foundational services were rock-solid did I consider adding anything else.
When you do expand, do so incrementally and with a clear purpose. Each new service should solve a specific problem or fulfill a genuine need, not just be added “because I can.” For example, after my file and media servers were stable, I added a Pi-hole container to block ads network-wide, a single, self-contained service that immediately provided value. This disciplined approach ensures that your server remains manageable, performs optimally, and doesn’t become another tech project gathering virtual dust. Remember, the goal is utility and reliability, not just compiling the longest list of running applications.
Frequently Asked Questions
Q: Do I really need server-grade hardware for a home server?
A: Not necessarily enterprise-grade, but investing in components designed for reliability and efficiency (e.g., low-power CPUs, motherboards with multiple SATA ports, potentially ECC RAM depending on data criticality) will save you headaches and money in the long run. Repurposed consumer hardware often leads to higher power consumption, more noise, and fewer features useful for server tasks.
Q: Is it safe to expose my home server to the internet?
A: Directly exposing your server’s services via simple port forwarding is generally unsafe. It opens your home network to potential attacks. A much safer approach is to use a VPN server on your network (like WireGuard or OpenVPN) and connect to it when you need external access, or employ a reverse proxy (like Nginx Proxy Manager) for web services, ensuring proper SSL/TLS and security configurations.
Q: Should I use a dedicated server OS like FreeNAS/TrueNAS, or a general-purpose Linux distribution?
A: For specialized tasks like Network Attached Storage (NAS), dedicated operating systems like TrueNAS SCALE (which is Linux-based and supports Docker/VMs) or Unraid offer highly optimized experiences, often with built-in features for RAID, data integrity (like ZFS), and user-friendly management interfaces. For more general-purpose use cases where you want to run a wider variety of applications and have more control, a Linux distribution like Debian or Ubuntu Server, combined with virtualization (Proxmox VE) or containerization (Docker), provides excellent flexibility and performance.
Q: How much RAM and CPU power do I need for a home server?
A: This depends entirely on your planned workload. For a basic file server or media server, 8GB of RAM and a low-power dual-core CPU (like an Intel Celeron or AMD Athlon) might suffice. If you plan to run multiple VMs, transcode 4K video, or host game servers, you’ll need more: typically 16GB-32GB+ RAM and a quad-core or more powerful CPU (e.g., Intel Core i3/i5 or AMD Ryzen). Always over-estimate slightly rather than under-estimate, as upgrading RAM is easier than a CPU.
Q: What’s the best way to back up my home server’s data?
A: The 3-2-1 backup strategy is paramount: have at least 3 copies of your data, stored on at least 2 different types of media, with at least 1 copy off-site. For a home server, this could mean one copy on your server’s main storage, a second copy on an external hard drive or a different internal drive, and a third copy encrypted and uploaded to a cloud service (e.g., Backblaze B2, S3) or another physical location. Automated backup solutions are crucial to ensure consistency and reliability.
Conclusion
Building a home server is less about the hardware itself and more about the deliberate choices you make regarding its purpose, software architecture, and security. My own journey from frustrated tinkerer to confident administrator hinged on understanding that simply throwing powerful components and various applications together doesn’t yield a reliable system. Instead, it requires a focused approach: choosing the right, dedicated hardware for efficiency, embracing virtualization or containerization for isolation, meticulously configuring your network, prioritizing robust security measures like VPNs over simple port forwarding, and, most importantly, resisting the urge to over-engineer by starting small and scaling purposefully. If you’re considering a home server, pause, define your core needs, and build a system that truly serves those needs, rather than chasing every feature under the sun. The reliability and control you gain are well worth the initial planning and focused effort.
Written by Marcus Thorne
Software analysis and cybersecurity tips
A former software engineer, Marcus transitioned into tech journalism to explain complex digital concepts in simple terms.
You Might Also Like

Why Most USB-C Hubs Are a Headache (And What Actually Works for Reliable Connectivity)
Fed up with flaky USB-C hubs? Discover why many fail, common pitfalls, and what features truly ensure reliable, multi-device connectivity.

Why Most People Don't Understand Their Computer Specs (And What Actually Matters)
Stop comparing GHz and GB. Learn what computer specs truly impact performance, value, and your daily experience. Marcus Thorne explains.

Why Most Budget Smart Light Bulbs Disappoint (And What Actually Works for Real Smart Home Control)
Cheap smart bulbs promise convenience but often fail to deliver. Discover the hidden issues and what truly makes a difference for reliable smart lighting.